
With all this snow we are getting around here one of my favorite things to curl up in is a fleece blanket. We have several around our house: a Michigan State one, one given to me by my nephew, a "tiger-like" one, etc. I love that it is unique and home-made, plus it is so warm and cozy! Here I am going to walk you through how to make one of your own! This tutorial includes lots of picture as I am more of a visual person when it comes to learning new things!

Materials needed for this project:
- Sharp scissors
- 2 1/2-3 yards of two fleece (these can be be the same, two different ones--- it is up to you!)
- I like the measurement of 2 1/2-3 yards because I like mine longer to cuddle up in. If you just want a lap blanket I would suggest 2 yards.
- Ruler or tape measure
- piece of paper

Step one:
- Lay out your two fleece on a large surface (on top of your bed or here I used our pool table) and match them up. Sometimes the materials, from being cut off the roll, will not match up evenly. Cut off any excess, such as if one fleece is really hanging over the edge or below another. I also like to cut off any kind of writing that may be part of the roll too.


Step Two:
- Begin at one corner. Measure 3 inches up and 3 inches across and cut out the corner.

- Why cut out the corner? Once you start cutting, it will make sense, but you want to cut out the corner in order to have all the edges match up and the blanket flow. I have provided a couple pictures below to help explain this too.


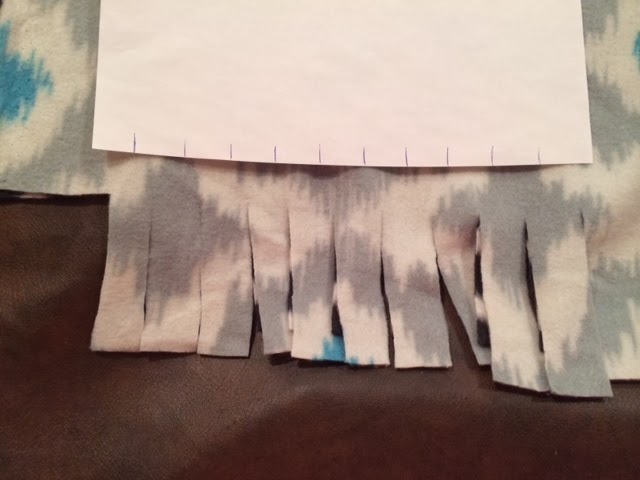
Step Three: Begin cutting approximately 1 inch strips down the blanket. I find it helpful to take a piece of paper and mark it every 1 inch, then you can place this on your blanket and it gives you a better idea of where to cut each strip. It is helpful to have sharp scissors to make the cut through both layers of fleece.
Step Four: After you have cut several strips, now you want to go back and begin tying them together. You want to double knot the fleece together and try to make sure that the opposite pattern shows when the knot is done.


Step Five: Keep cutting and tying all around the blanket until you have finished. Remember when you get close to a corner, if you have not already done so, you need to cut the 3 inch by 3 inch corner out so that the corners will flow together.

This project probably took me a total of 1 hour and 15 minutes, minus the dog interruptions! I swear they are very bored today! This project is very simple and it could take you less time if you have a buddy helping you cut and you follow behind tying the strips.

The possibilities of what you can do with this project are endless! Don't be afraid to get creative and add together fun patterns. Or if you have a sports enthusiast in your home, make him/her a blanket of their favorite sports team! You can also make smaller ones that make a great gift for someone expecting a baby. For the baby blanket I would suggest doing 1 to 1 1/2 yards for the smaller size. Another twist I did on it was I made one in to a dog bed for their kennel. Before I finished tying the last little bit I stuffed it with old t-shirts and sweatshirts of Tyler and I's so that it reminded them of us while we are gone. Jo-Ann Fabrics and Hobby Lobby often run deals where you can get fleece 30-40% off!! Or when they do not have a sale you can download apps for these stores that have coupons.
What is keeping you warm this winter? Do you have a favorite gift that someone has given to you that was home made?
Thanks for checking out this tutorial! As always, feel free to email me with any questions you may have! romzeka@gmail.com

I made my husband a big tie blanket a few years ago...in Detroit Lions fleece of course :) I love the idea of making a dog bed! I just might have to do that.
ReplyDeleteThat's funny that you say that because after I made this one yesterday my husband said "When are you going to make me a Detroit Lions or Tigers one?" :) Now I have a birthday or Christmas idea stashed away!!
Delete